The one thing I miss the most from my print design days is the freedom I had to use whatever fonts I wanted. Back in the day, I was called the Font Queen because I could name all the fonts I saw whether they were on billboards, invitations, or tv commercials. But now that I don’t have that everyday study and usage of dozens of fonts, I’m out of font-shape.
In the web world I don’t need to be the Font Queen, but I still want to use some of my old favorite fonts, ya know? The generic ones provided for developers leave something to be desired.
But with the addition of Google Web Fonts earlier this year, you can spruce up your site with any number and style of fonts. There’s no limit. Wha-hoo! (But be careful. Using too many can be confusing and increase the page's load time. One or two should do it for most sites.)
Linking your site to Google Web Fonts will save you the trouble of having to include each font file into your site’s folders and source code. All you have to do is select the fonts your want and copy and paste the code that Google provides. It’s way simple! I’ll show ya:
Step 1 - Choose the fonts you want
Go to http://www.google.com/webfonts#, browse through the fonts available, and select the ones you want by clicking the ‘Add to Collection’ button.

Step 2 – Click the ‘Use’ button at the bottom of your screen
This will take you to a window with customized instructions and code for your fonts.

Step 3 – Choose the styles you want:

Step 4 - Choose the character sets you want:

Step 5 – Copy either the ‘Standard’ or ‘@import’ code
You can select either the ‘Standard’ way of referencing to Google’s library or you can import it as a url. You decide. Just copy and paste the code into the head section of your html document.


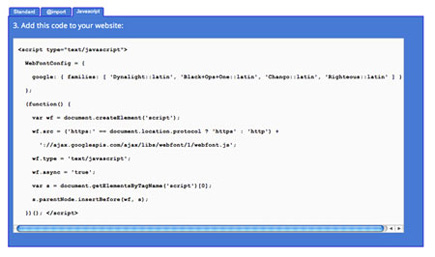
Step 6 – Copy the JavaScript code
Copy and paste the JavaScript code provided into the head section of your html document.

Step 7 – Copy the CSS code
Copy and paste the CSS code inside a style tag in your html document. Don’t forget to add class names and format them appropriately as I have done below.


And you’re done! See how easy that was.